Home
Welcome to PiP iT Global's Merchant Dashboard Docs
This document describes in detail how to use PiP iT Global's Merchant Dashboard.
For information on PiP iT Global's API, check https://api.pipit.global
Functionality: What's New?
Order Refunds:
Merchants can issue a refund for paid orders.
Payouts:
Send cash from the UK instantly.
Set up your float and, once cleared, you can issue instant payouts to your end customers.
Multiple Users Per Vendor:
Vendors can now set up multiple sub-accounts for agents, etc., and monitor their orders.
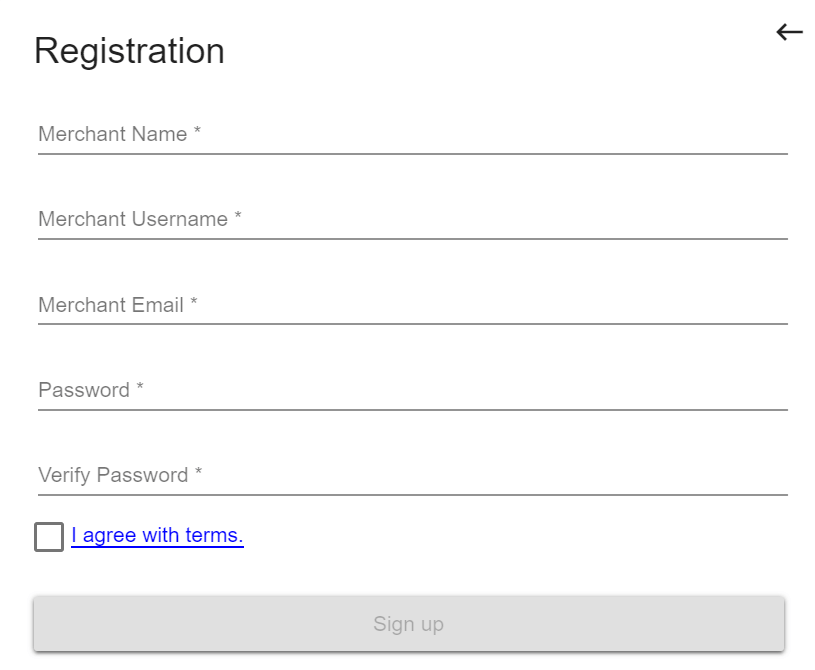
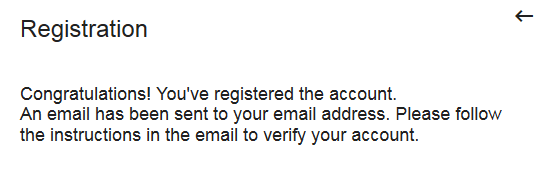
How Do I Sign Up to the Merchant Dashboard?
Navigate to our dashboard by using the following url.
https://merchant.pip-it.net

Click Sign Up to reach the url for sign up.
https://merchant.pip-it.net/signup
How Do I Log In to the Merchant Dashboard?
Navigate to our dashboard.
https://merchant.pip-it.net
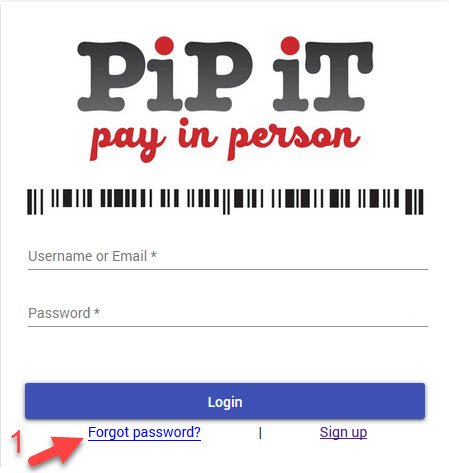
From the dashboard screen, enter your username/email and your password and click Login.
Why Can't I Log In to the Merchant Dashboard?
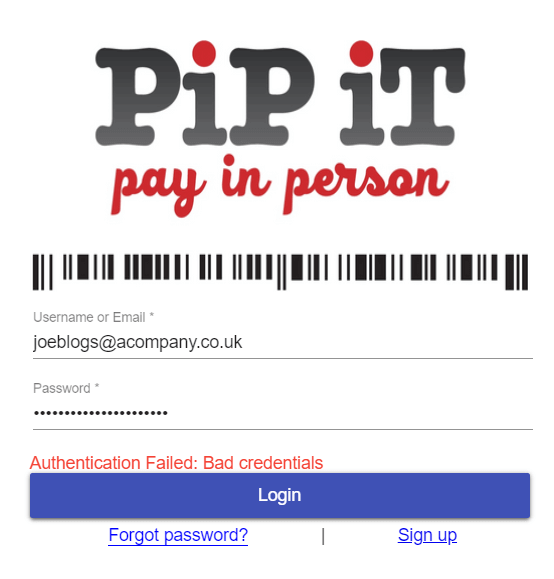
If you see a message like the one above, at least one of the following is incorrect:
* Username / Email
* Password
So either retype these or reset your password (see below).
How Do I Reset My Password?
① Forgot Password: click Forgot password? to go to the password reset screen.
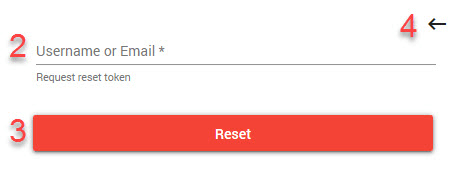
② Field: enter your username or email address.
③ Reset: click to request a password reset token to your email address.
or
④ Return: return to the login screen without requesting a password reset token.
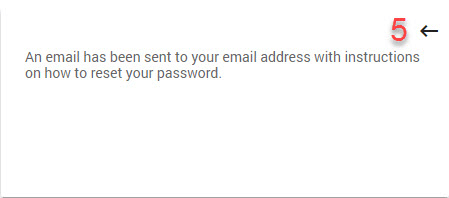
⑤ Return: return to the login screen.
What Can I Access From the Merchant Dashboard?
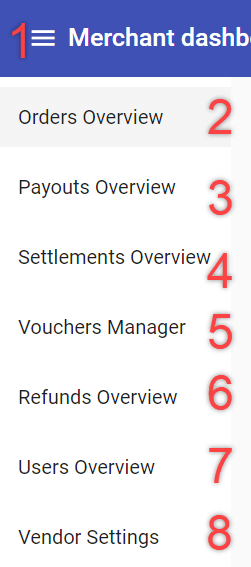
① Left Menu: click hamburger icon to open or close.
② Orders Overview: view all orders.
③ Payouts Overview: view all payouts.
④ Settlements Overview: view merchant settlements.
⑤ Vouchers Manager: create and view vouchers.
⑥ Refunds Overview: view refunds granted.
⑦ Users Overview: manage user profiles.
⑧ Vendor Settings: manage user selected currencies.
⑨ ‘Currency’ drop-down menu: click currency to view and create orders.
⑩ ‘Type’ drop-down menu: click type to view orders.
⑪ Search: find orders by reference number.
⑫ Order: click specific order’s entry to view its details.
⑬ Create order button: active once currency is selected.
⑭ Right menu: click dots icon to open or close.

⑮ Help: open merchant dashboard documentation.
⑯ Profile: view merchant profile.
⑰ Change Password: change account password.
⑱ Logout: log out of merchant account.

How Do I Create an Order?
① Click and select currency to activate Create button.
② Click Create button to go to add new order screen.
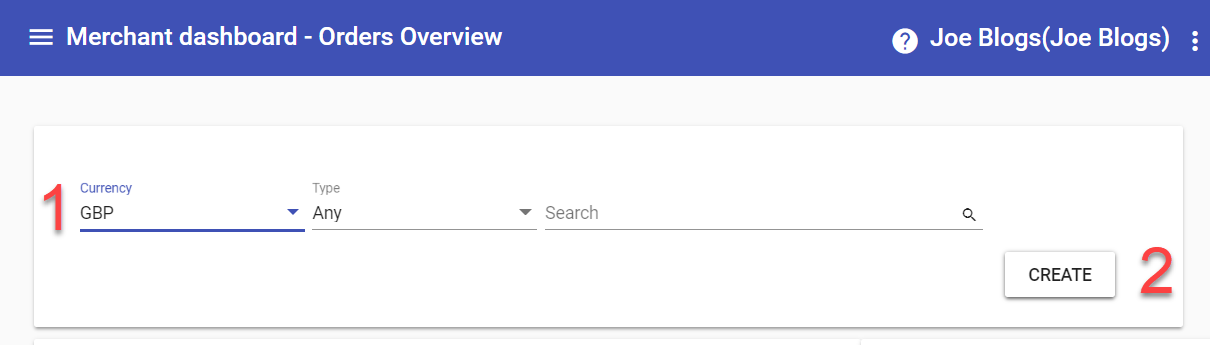
Note
The CREATE button is only active when a currency is selected.
Enter Details Into the Appropriate Fields
③ Customer email address.
④ The order amount in the set currency.
⑤ Your reference.
⑥ Customer mobile number (optional).
⑦ Expiration time in seconds.
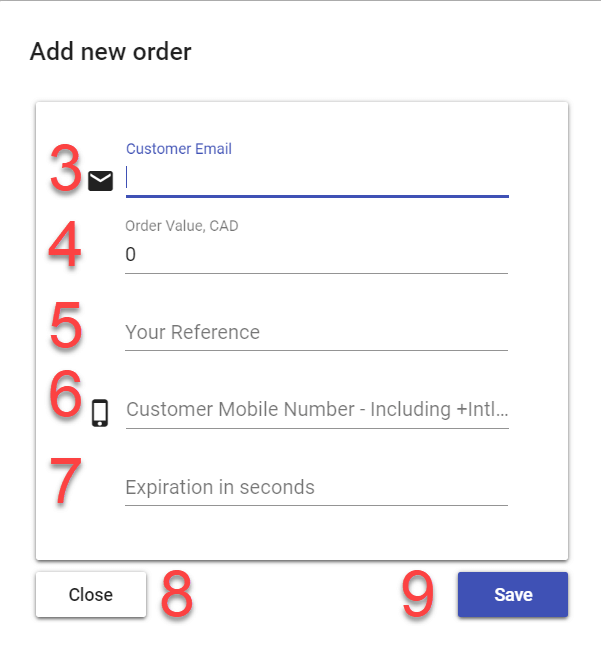
To Finish, Select One of the Following
⑧ Close button to cancel creating order, or click
or
⑨ Save button to complete creating the order.
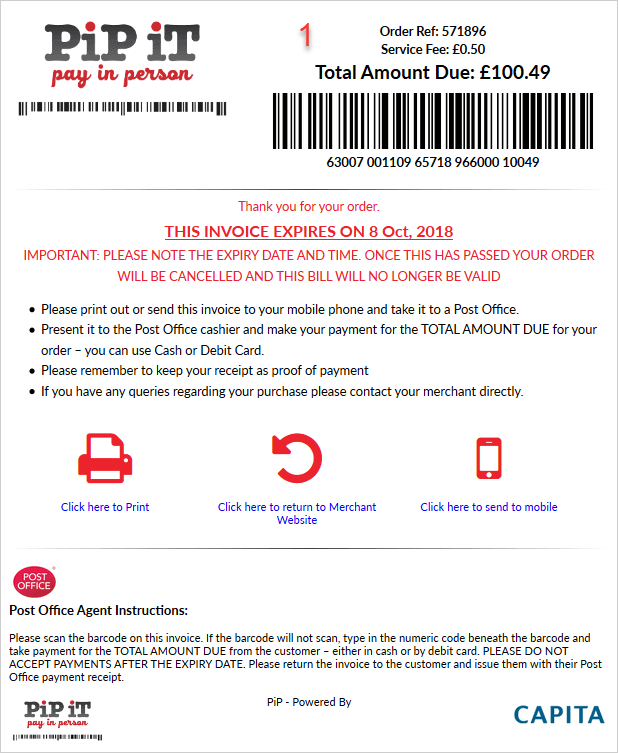
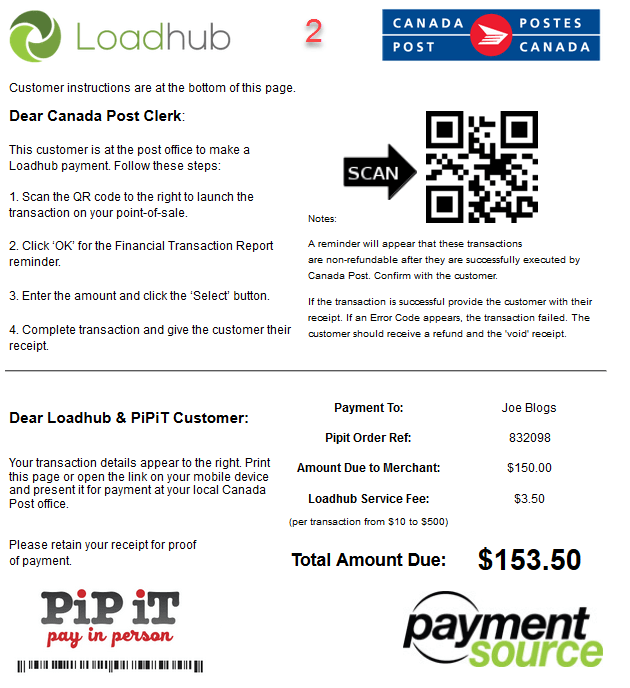
What Does an Order Confirmation Look Like?
Examples of order confirmations are shown below for:
① UK Post (GDP and EUR)
② Canada Post / Postes Canada (CAD)
How Do I Get Information on Payments?
① Payouts Overview screen.
② Click Currency drop-down menu. Select a currency to
activate Create button.
Note
The CREATE button is only active when a currency is selected.
③ Click options in Type drop-down menu to view vouchers
by type.
④ Create button: activated through selecting a currency.
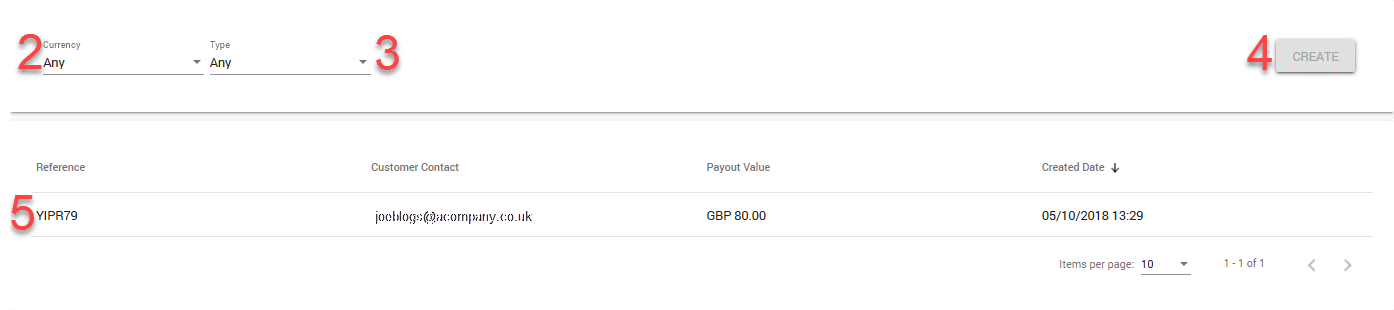
⑤ Click payments entry to display ⑥ additional information.

How Do I Check Payouts and Request Payments?
① Payouts Overview screen.
② With a currency selected, the screen will display both existing payments and activate the Create button.
Note
The CREATE button is only active when a currency is selected.

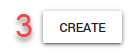
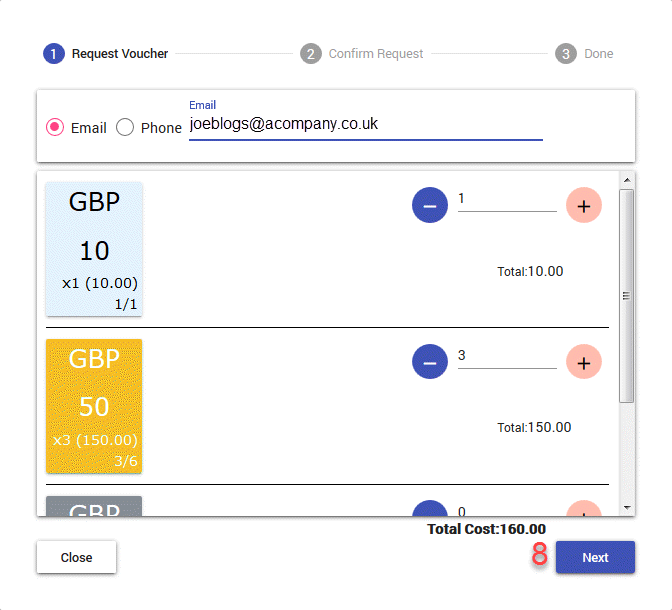
③ Click Create button to request payments.
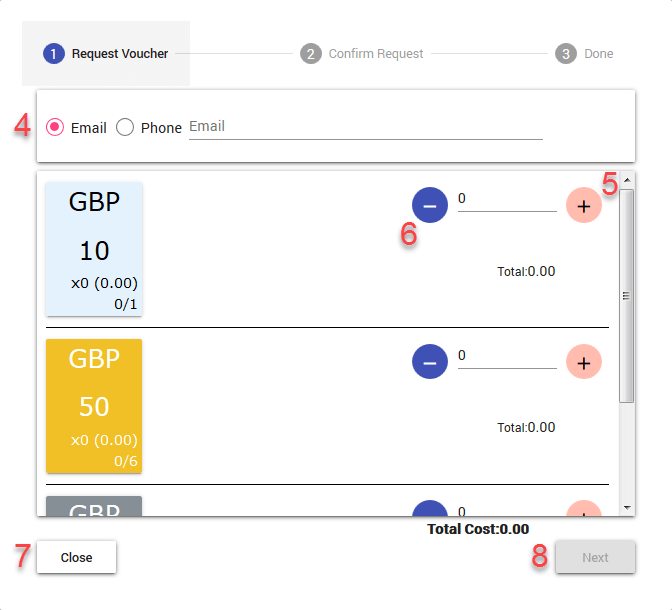
④ On the payment request screen, either use default Email
or click Phone radio button to select means of contact.
⑤ Click pink icons with plus symbols to add vouchers.
⑥ Click blue icons with minus symbols to remove vouchers.
⑦ Click Close button to cancel request and return to Payouts Overview screen.
or
⑧Click Next button to proceed with request.
Note
The NEXT button is only active when at least one voucher is added.
Confirm Request screen
⑨ During confirmation, the final voucher details are displayed.
⑩ Displays total fee and cost of added vouchers.
⑪ To return to the payment request screen, click Back button.
⑫ To cancel the payment, click Close button.
⑬ Click Confirm button to confirm request.
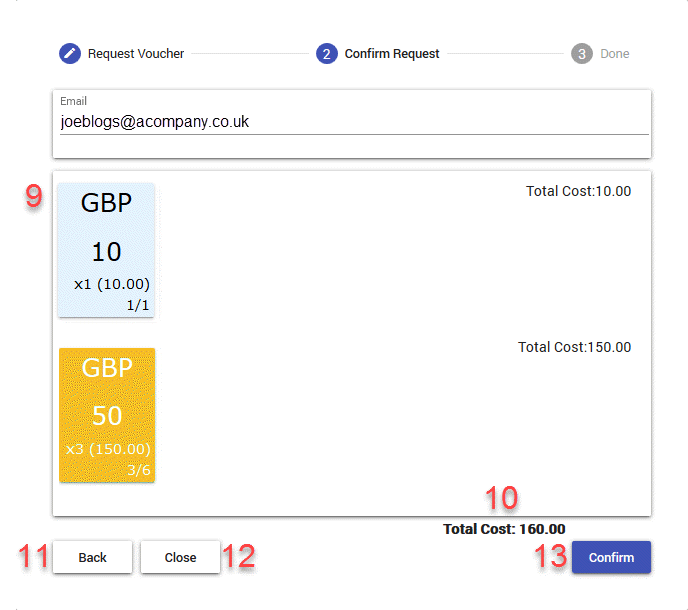
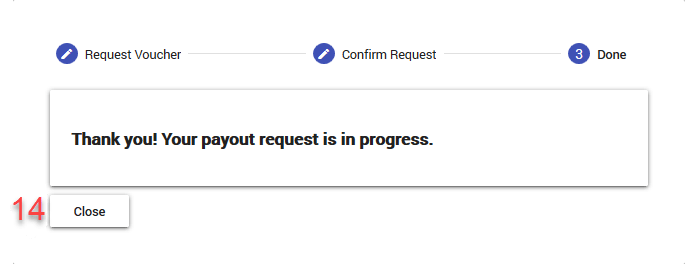
⑭ Click Close button to close the screen and return to Payments Overview screen.
How Do I Get Information on Settlements?
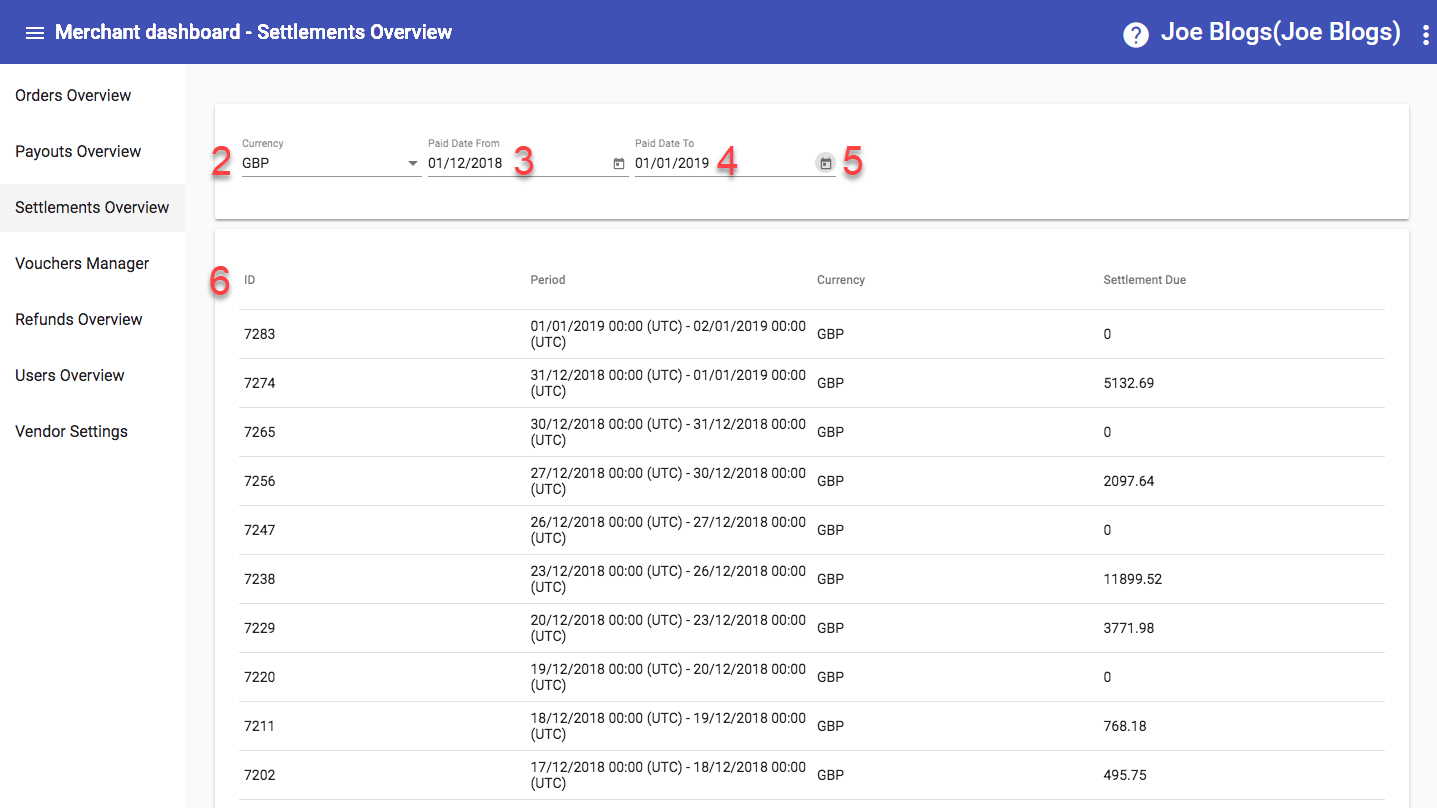
① Settlements Overview screen.
② Currency drop-down menu to view settlements by currency.
③ Paid Date From drop-down menu.
④ Paid Date To drop-down menu.
⑤ Calendar button.
⑥ Click an Entry for additional settlement details.
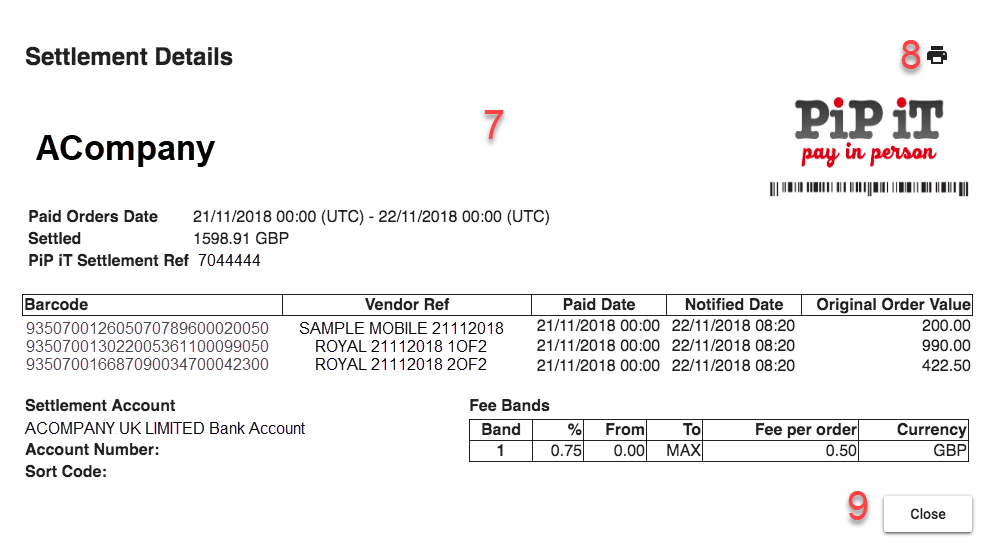
⑦ Settlement Details
⑧ Click printer icon for information in printable format.
⑨ Click Close button to close settlement details and return to settlements overview.
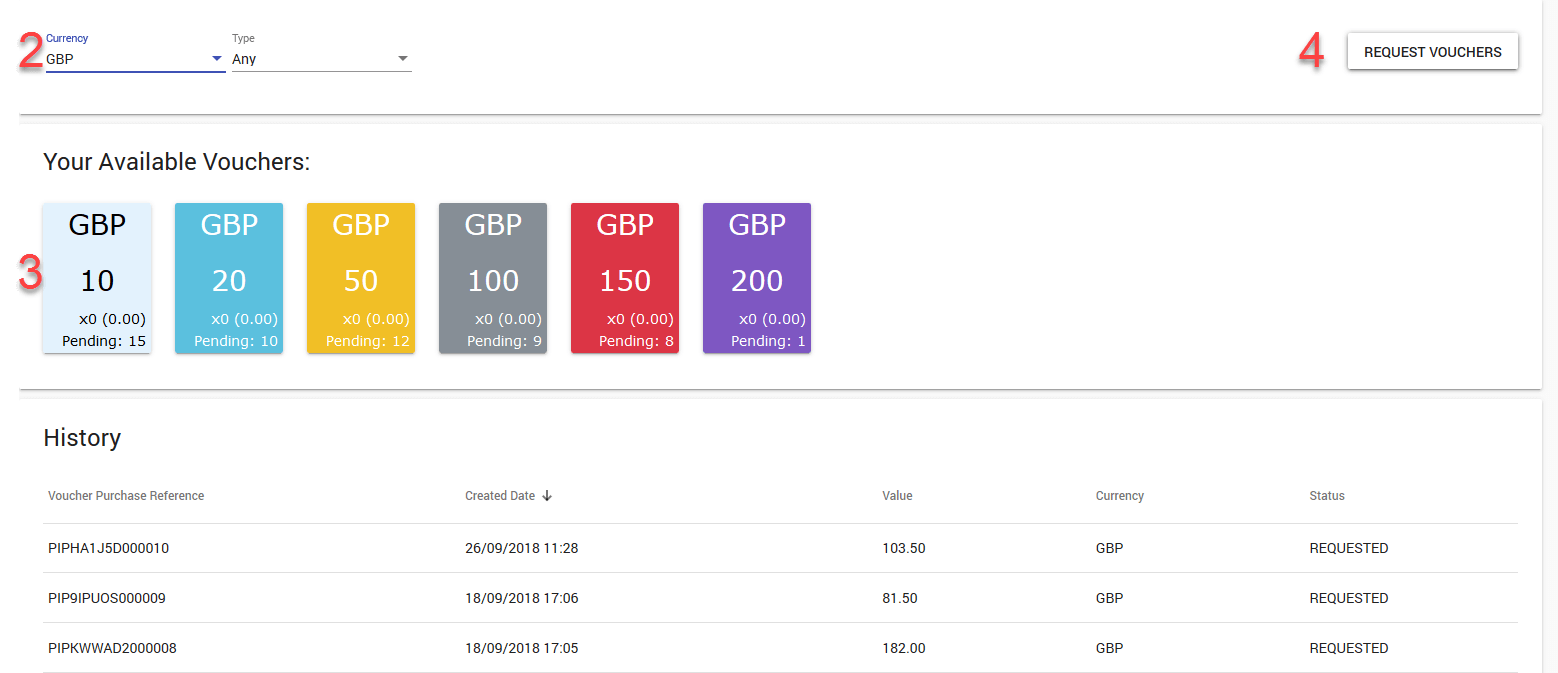
How Do I Get Information on Vouchers?
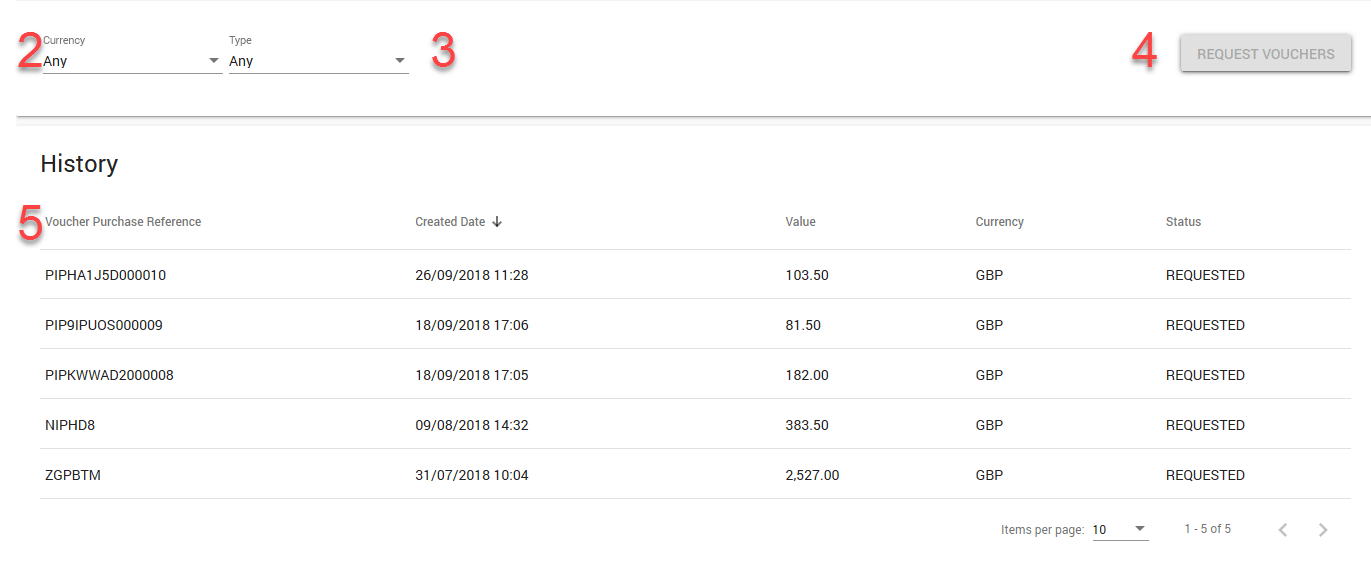
① Vouchers Manager screen.
② Click Currency drop-down menu. Select a currency to activate ‘Request Vouchers’ button.
Note
The REQUEST VOUCHERS button is only active when a currency is selected.
③ Click options in Type drop-down menu to view vouchers by type.
④ Request Vouchers’ button: activated through selecting a currency.
⑤ Click refund entry to display ⑥ additional information.
⑥ Click blue "i" circle icon to display the banking information for a voucher.

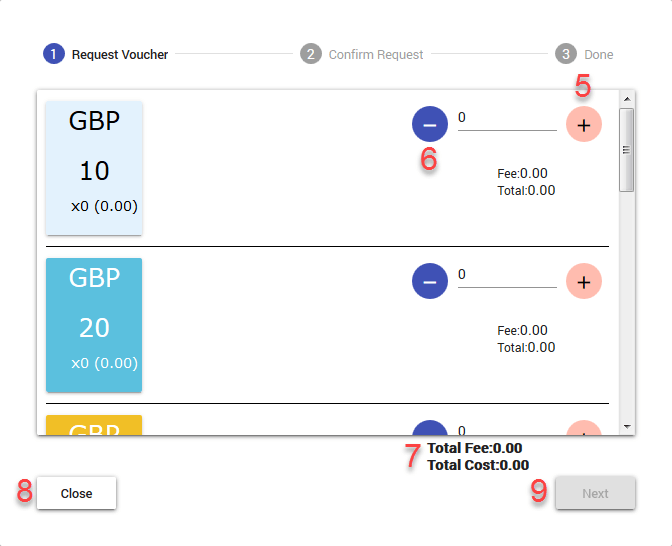
How Do I Request Vouchers?
① Vouchers Manager screen.
② With a currency selected, the screen will both display ③ existing vouchers and activate the ④ Request Vouchers button.
Note
The REQUEST VOUCHERS button is only active when a currency is selected.
Click this button to request vouchers.
⑤ Click pink icons with plus symbols to add vouchers.
⑥ Click blue icons with minus symbols to remove vouchers.
⑦ Displays total fees and cost of added vouchers.
⑧ Click Close button to cancel vouchers request.
⑨ Next button activated by adding vouchers; click this to
proceed to Confirm Request screen.
Note
The NEXT button is only active when at least one voucher is added.
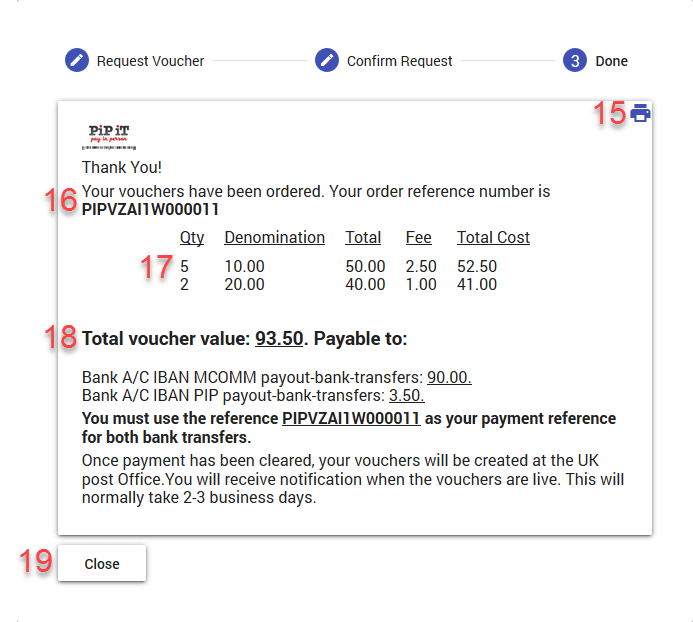
⑩ Displays final voucher details.
⑪ Displays total fees and cost of added vouchers.
⑫ To return to the refund request screen, click Back button.
⑬ To cancel the refund, click Close button.
⑭ To confirm the refund, click Confirm button.

⑮ Click printer icon for information in printable format.
⑯ Unique order reference.
⑰ Quantity and amounts.
⑱ Total voucher(s) value and banking charges.
⑲ Click Close button to close this screen.
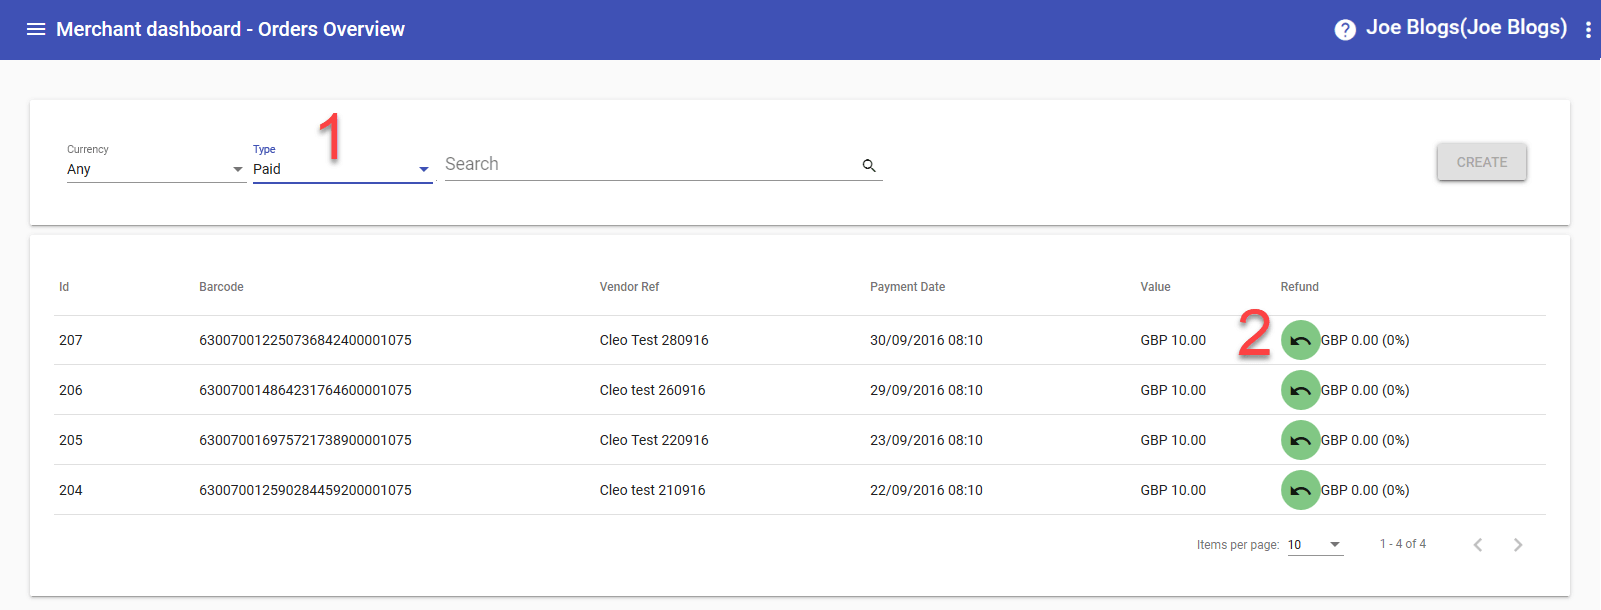
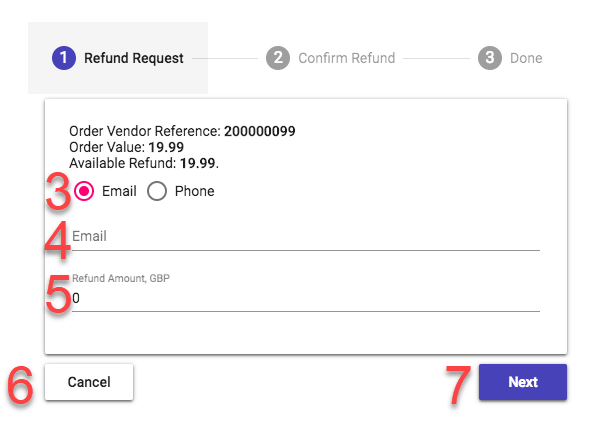
How Do I Refund an Order?
Note
Only paid orders are eligible for refunds.
① Click in Type drop-down menu and select Paid to show all paid orders.
② To refund an order, click the related icon (a green circle with black arrow) for the refund request screen.
③ On the refund request screen, either leave Email radio button set or click Phone radio button to select means of informing customer.
④ Enter customer email address or phone number.
⑤ Enter the amount to refund.
⑥ Click Cancel button if you need to cancel to cancel the refund.
⑦ Click Next button to continue to the confirmation screen.
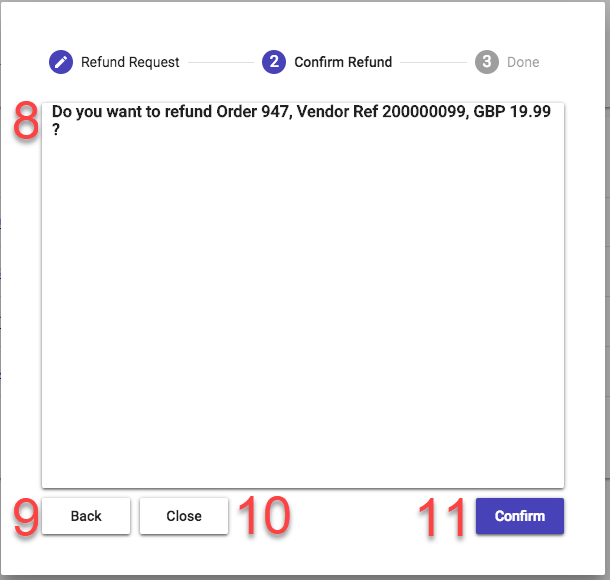
⑧ During confirmation, the final refund details are displayed.
⑨ Click Back button to return to the refund request screen.
To Finish Select One of the Following:
⑩ Close button to cancel the refund
or
⑪ Confirm button to confirm the refund
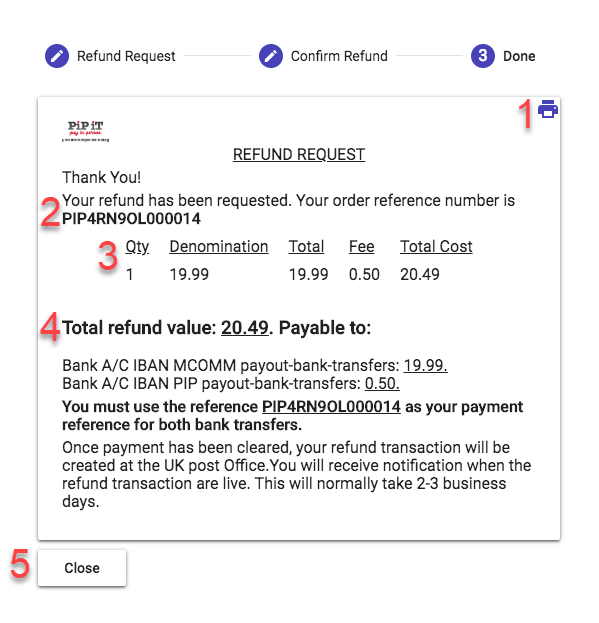
What Does a Refund Confirmation Look Like?
The key information in a refund confirmation is noted as follows:
① Click printer icon for information in printable format.
② Unique order reference.
③ Quantity and amounts.
④ Total refund value, banking charges, and payable to.
⑤ Click Close button to close the screen.
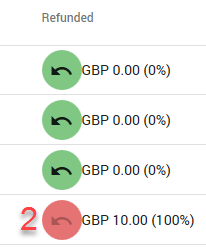
How Do I Get Information on Previous Refunds?
① Orders Overview screen
② A red circle icon indicates a successful refund. A green icon indicates an order that can still be refunded.
③ Refunds Overview screen
Click ④ refund entry to display ⑤ additional information.

⑥ Click blue "i" circle icon to display banking information on a refund.

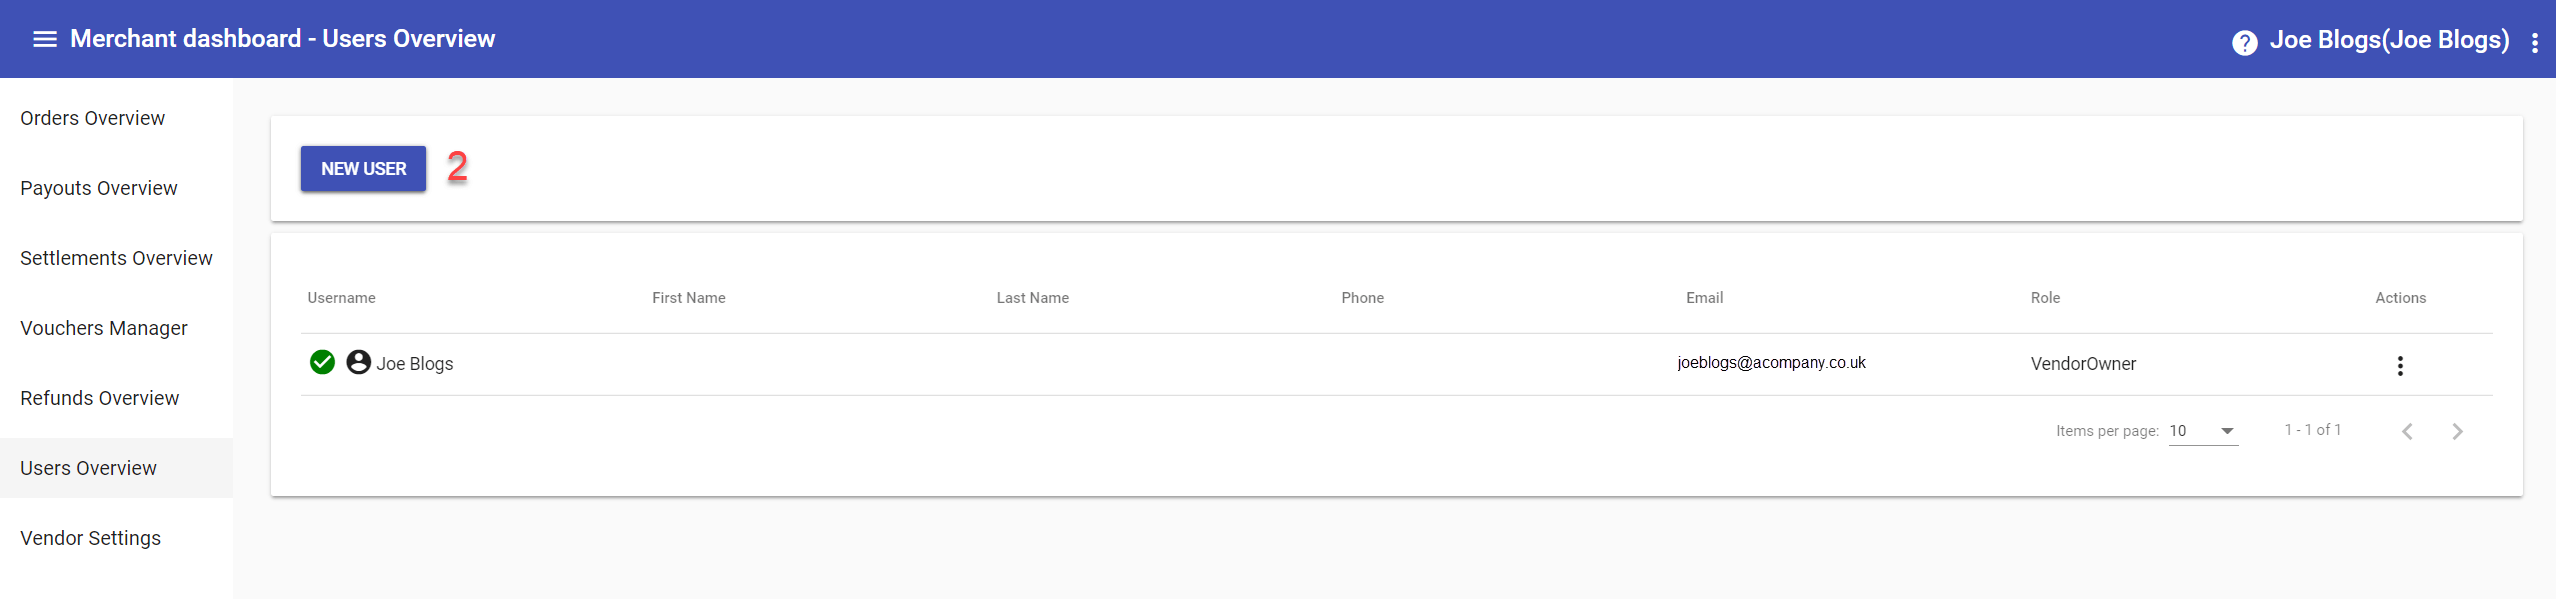
How Do I Add a User?
① Users Overview screen.
Displays details of existing users.
② Click New User button to add a user.
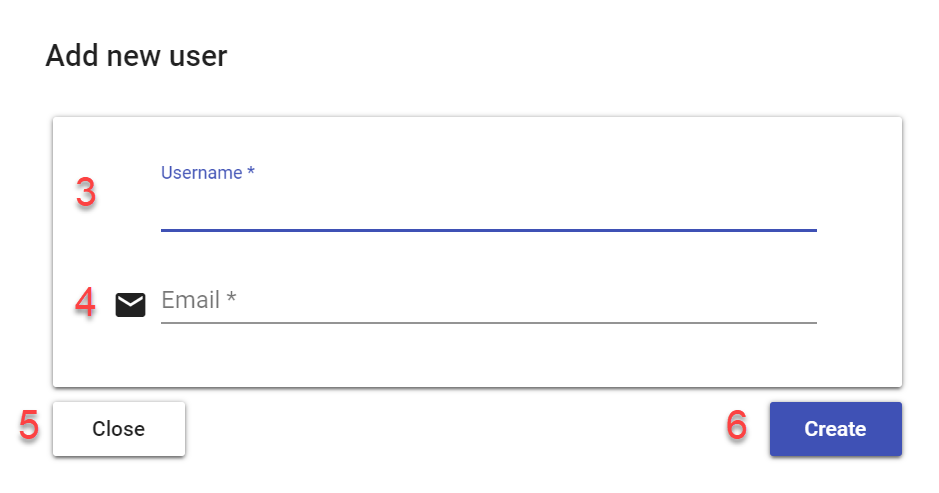
③ Enter username for new user.
④ Enter email address for new user.
⑤ Click Close button if you need to cancel adding a user.
or
⑥ Click Create button to finish adding a new user.
Additional Support
Contact support@pipit.global if an email address must be removed entirely.